Haven’t you always wanted to setup your website so that every change you make to your repo produces the cooresponding change in production automatically? Well in this post we’ll look at how to setup Azure DevOps to monitor a GitHub repository that contains a Jekyll website and compile and publish on every commit to master.
Problem
How do we use Azure DevOps to monitor a GitHub repository containing a Jekyll website and compile every change to the master branch and publish those changes to our $web container in a Storage Account.
Solution
Azure DevOps Pipelines (ADP) are a very powerful CI/CD pipeline tool that gives you tremendous capability out of the box. I have been a Jenkins user for quite some time. I even spent 3 years working for CloudBees, the main sponsor of Jenkins, so I feel like I know a bit about building pipelines. And I can honestly say that I have been pleasantly surprised at the power and reliability of ADP. I will admit that this particular pipeline project is very simple but it does demonstrate a few of the core principals of ADP.
This post focuses on ADP so I won’t go into the details of setting up Jekyll for building a website with a static site generator. There are loads of sites out there that will help you do that. Here are just a few:
In this post we’ll look at how to use Azure Pipelines to build a GitHub repository each time a commit is made to the master branch of the repository. Once the build is complete we will also deploy the new files to an Azure Storage Account’s blob storage that we previously configured as a website (see Azure Storage for Your Website and Verizon CDN Rules for Redirects.
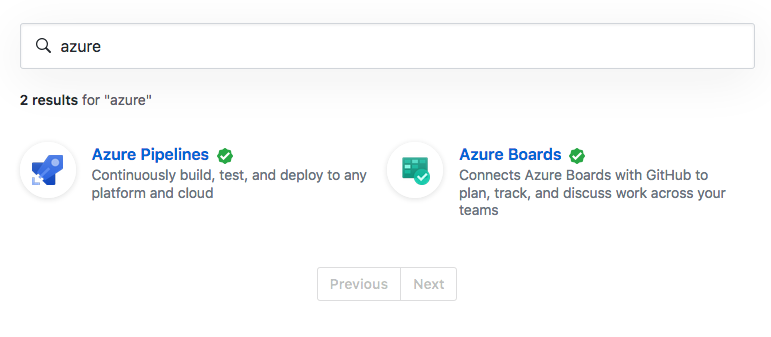
To start with you’ll need an Azure DevOps Account which should be easy enough to
get using GitHub Marketplace… just search for Azure and you should see 2
results.
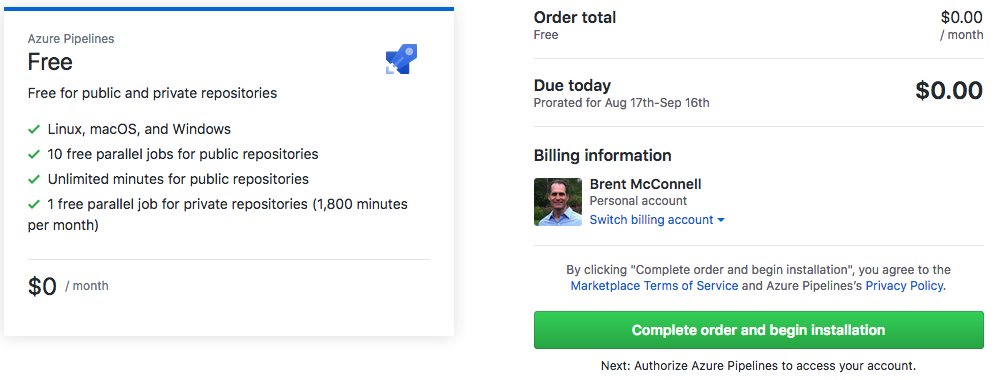
 After choosing the Azure Pipelines option you’ll be prompted to install it for
free into your GitHub account. You’ll have 2 options available to choose from,
The Free option will give you 1 free parallel job on a private repo or 10 free
parallel jobs for public repositories which is more than enough for what we are
doing.
After choosing the Azure Pipelines option you’ll be prompted to install it for
free into your GitHub account. You’ll have 2 options available to choose from,
The Free option will give you 1 free parallel job on a private repo or 10 free
parallel jobs for public repositories which is more than enough for what we are
doing.
 At this point you can establish an organization and project in Azure DevOps and
create the OAuth credentials necessary to link your GitHub repository with Azure
DevOps where you’ll manage your build pipelines. Once connected you’ll be
directed to a page that allows you to select the repository you’d like to
connect your build pipeline to. If you haven’t already done so you’ll want to
review the Jekyll tutorials above and create your Jekyll repository in GitHub.
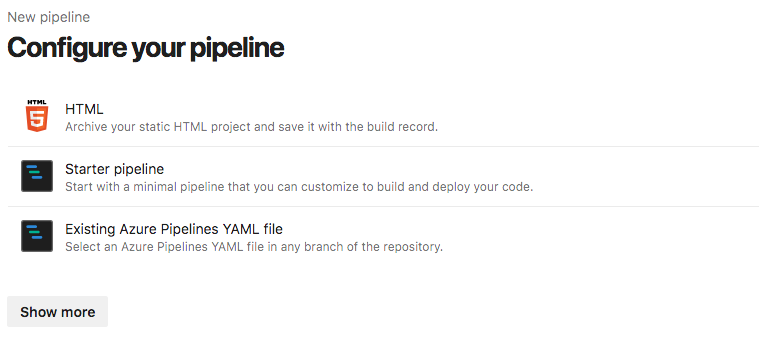
Once you have a repository you can select the Builds option in the left menu
and create a New Pipeline. This will allow you to select the GitHub
repository you want to link with ADP and also give you the option of
boostrapping your build with a Starter pipeline.
At this point you can establish an organization and project in Azure DevOps and
create the OAuth credentials necessary to link your GitHub repository with Azure
DevOps where you’ll manage your build pipelines. Once connected you’ll be
directed to a page that allows you to select the repository you’d like to
connect your build pipeline to. If you haven’t already done so you’ll want to
review the Jekyll tutorials above and create your Jekyll repository in GitHub.
Once you have a repository you can select the Builds option in the left menu
and create a New Pipeline. This will allow you to select the GitHub
repository you want to link with ADP and also give you the option of
boostrapping your build with a Starter pipeline.
Azure Pipelines
With the Starter pipeline you’ll get a basic pipeline that is triggered by changes to your master branch, uses the vm image of ubuntu-latest and runs a basic bash script.
trigger:
- master

pool:
  vmImage: 'ubuntu-latest'

steps:
- script: echo Hello, world!
  displayName: 'Run a one-line script'

- script: |
    echo Add other tasks to build, test, and deploy your project.
    echo See https://aka.ms/yaml
  displayName: 'Run a multi-line script'
So right away we have the bones of what we need to get started. Let’s look at our basic requirements before going any further.
Requirements
- Build on changes to the master branch in our repository. Adding feature branches or tags shouldn’t trigger a build.
- Compile our repository using jekyll to produce a “_site” directory containing our static website.
- Upload the “_site” directory contents to an Azure Storage account blob container named “$web”
- Purge our CDN contents so the new files are served
There are plenty of other things we could do if we wanted but these are the basics of what we need to get done in our pipeline.
Let’s take a look at what our finished pipeline looks like and we’ll go from there:
trigger:
  branches:
    include:
    - master
  paths:
    exclude:
    - README.md
    - LICENSE.txt

pool:
  vmImage: 'ubuntu-16.04'

steps:
# Build Jekyll Website
- script: |
    mkdir _site
    touch Gemfile.lock
    chmod a+w Gemfile.lock
    docker run --rm \
        -i jekyll/builder:3.8 \
        jekyll build
    ls -la _site

# Copy using Azure CLI on Ubuntu
- task: AzureCLI@1
  displayName: Copy data to storage acct
  inputs:
    azureSubscription: imperfect
    scriptLocation: inlineScript
    inlineScript: |
      echo "Running az script."
      az storage blob upload-batch \
        --destination \$web \
        --account-name "azurepatterns" \
        --source "_site"

#Purge CDN to update content
- task: AzureCLI@1
  displayName: purge CDN contents
  inputs:
    azureSubscription: imperfect
    scriptLocation: inlineScript
    inlineScript: |
       echo "Purging cdn content"
       az cdn endpoint purge \
        --name azurepatterns \
        --profile-name azurepatternscdn \
        --resource-group azurepatterns \
        --content-paths '/*'
Breaking It Down
Let’s look at each of our requirements and how they are satisfied by this script.
Trigger
trigger:
  branches:
    include:
    - master
  paths:
    exclude:
    - README.md
    - LICENSE.txt
The trigger section of the script tells Azure DevOps when the script should execute. In the scenario above I am only concerned about commits to master. By default all branches will trigger a build but since, in our case, we only wanted to trigger on master we add master as our trigger. I also wanted to exclude a few things that I didn’t want to trigger the build like the README and the LICENSE file. To learn more about the advanced features of ADP you can check out Build Pipeline Triggers documentation on the Microsoft site.
One last point on triggers that I’ll leave you with is that there may be times that you want to commit to master and not trigger a build. ADP has built-in commit message scanning that allows you to do this. All you need to do is put [skip ci] in your commit message and ADP won’t trigger on that particular commit… NICE!
Running Jekyll to Build the Website
pool:
  vmImage: 'ubuntu-16.04'
Here we are using a Microsoft provided build agent for Ubuntu 16.04. If we dig around on the Microsoft website you’ll find that this agent is actually what I would call a “kitchen sink” agent that has nearly everything you can think of installed for building software
There are several ways to install and run jekyll on this agent. We could:
- Create our own image and use it for the agent. This would allow us to install just the software we need to get the job done but we would have to maintain the image and I don’t really want to do anything related to image maintenance for this project.
- Use the existing 16.04 image that Microsoft supplies since it comes with Ruby, build-essentials and most of the other goodies we’d probably need. We could then just use “gem install jekyll bundler” to finish off what we need. This is a workable solution and has some appeal.
- Use a Docker container since this agent has a docker daemon running on it already.
Since I’m a big proponent of using Docker containers in build pipelines given their flexibility and versioning capabilities I’m using the Docker option. It is also convenient that Jekyll provides a “builder” container that contains many of the packages you’ll need for using this container in a CI process. Which takes us to the next step in the pipeline:
- script: |
    mkdir _site
    touch Gemfile.lock
    chmod a+w Gemfile.lock
    docker run --rm \
        -i jekyll/builder:3.8 \
        jekyll build
    ls -la _site
This command will pull the container image into the agent and run the jekyll build command to produce our website. We could speed this pipeline up quite a bit by customizing the builder container to contain all the gems we need for the website but given that I don’t think I’ll need that kind of performance right now I’ll save that as a potential topic for later and just use the standard container which works fine for my use case.
Copy Files to Storage Account
If you noticed in the last script section I created a _site directory and later I printed out the contents of the directory to stdout. You should see the contents of the _site directory displayed in your pipeline log. This directory contains all the static files you’ll need to run a website.
Usually, if we were on a Windows build agent we would use the AzFileCopy task to move files to an Azure Storage Account but in this case if you try it will produce an error and explain that it’s not available on Linux. But luckily we can use the AzureCLI task instead to the same effect. One of the subcommands of az storage blob is update-batch which performs the same basic function as AzCopy.
>> az storage blob upload-batch --help

Command
    az storage blob upload-batch : Upload files from a local directory to a blob container.

Arguments
    --destination -d [Required] : The blob container where the files will be uploaded.
        The destination can be the container URL or the container name. When the destination is the
        container URL, the storage account name will be parsed from the URL.
    --source -s      [Required] : The directory where the files to be uploaded are located.
    --auth-mode                 : The mode in which to run the command. "login" mode will directly
                                  use your login credentials for the authentication. The legacy
                                  "key" mode will attempt to query for an account key if no
                                  authentication parameters for the account are provided.
                                  Environment variable: AZURE_STORAGE_AUTH_MODE.  Allowed values:
                                  key, login.
    --destination-path          : The destination path that will be appended to the blob name.
    --dryrun                    : Show the summary of the operations to be taken instead of actually
                                  uploading the file(s).
    --lease-id                  : The active lease id for the blob.
    --max-connections           : Maximum number of parallel connections to use when the blob size
                                  exceeds 64MB.  Default: 2.
    --metadata                  : Metadata in space-separated key=value pairs. This overwrites any
                                  existing metadata.
    --no-progress               : Include this flag to disable progress reporting for the command.
    --pattern                   : The pattern used for globbing files or blobs in the source. The
                                  supported patterns are '*', '?', '[seq]', and '[!seq]'.
    --socket-timeout            : The socket timeout(secs), used by the service to regulate data
                                  flow.
    --timeout                   : Request timeout in seconds. Applies to each call to the service.
    --type -t                   : Defaults to 'page' for *.vhd files, or 'block' otherwise. The
                                  setting will override blob types for every file.  Allowed values:
                                  append, block, page.
...(content abbreviated)

Global Arguments
    --debug                     : Increase logging verbosity to show all debug logs.
    --help -h                   : Show this help message and exit.
    --output -o                 : Output format.  Allowed values: json, jsonc, none, table, tsv,
                                  yaml.  Default: table.
    --query                     : JMESPath query string. See http://jmespath.org/ for more
                                  information and examples.
    --subscription              : Name or ID of subscription. You can configure the default
                                  subscription using `az account set -s NAME_OR_ID`.
    --verbose                   : Increase logging verbosity. Use --debug for full debug logs.

Examples
    Upload all files that end with .py unless blob exists and has been modified since given date.
        az storage blob upload-batch -d MyContainer --account-name MyStorageAccount -s
        directory_path --pattern *.py --if-unmodified-since 2018-08-27T20:51Z
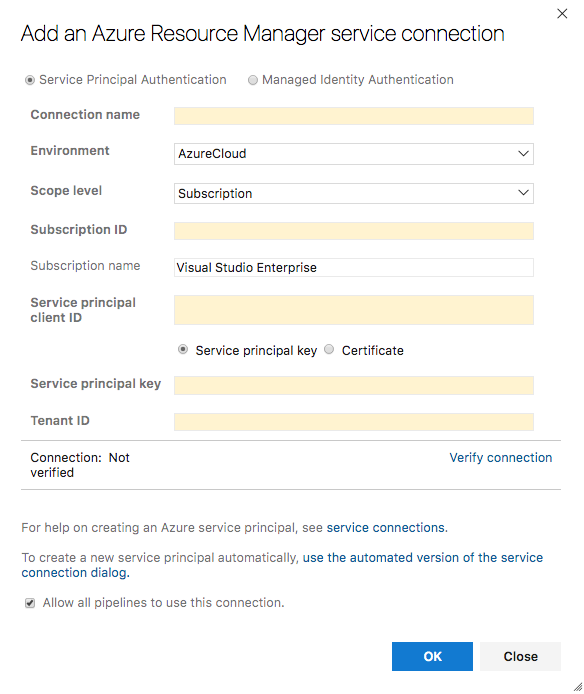
In order to use the AzureCLI task you’ll need to create a New Service Connection within Project Settings and you’ll want to use the Azure Resource Manager type Service connection and a service principal you’ve created.
You can create a Service Principal in Azure with:
>> az ad sp create-for-rbac --name azure-devops
Fill the relevant information into the Azure DevOps UI for Service Connections and use Verify connection to ensure everything is working as it should.
You can now use the AzureCLI task to complete the update-batch subcommand and copy our _site directory contents to Azure. In my case I named my Service connection “imperfect” and I’m using a Storage Account named “azurepatterns” and copying into the $web container that serves requests for my website.
- task: AzureCLI@1
  displayName: Copy data to storage acct
  inputs:
    azureSubscription: imperfect
    scriptLocation: inlineScript
    inlineScript: |
      echo "Running az script."
      az storage blob upload-batch \
        --destination \$web \
        --account-name "azurepatterns" \
        --source "_site"
Azure CDN Purge
At this point you might be done depending on whether or not you are using a CDN to distribute content and/or a certificate. If you are using a CDN you’ll need to to purge the content in the CDN so the new website content is distributed.
- task: AzureCLI@1
  displayName: purge CDN contents
  inputs:
    azureSubscription: imperfect
    scriptLocation: inlineScript
    inlineScript: |
       echo "Purging cdn content"
       az cdn endpoint purge \
        --name azurepatterns \
        --profile-name azurepatternscdn \
        --resource-group azurepatterns \
        --content-paths '/*'
Conclusion
And there you have it. You should now be able to make changes to your GitHub repository’s master branch and have those changes published automatically by this pipeline.